Water and propane, part one
Even more than electricity, water and propane are crucial to how our skoolie will allow us the comfort of having our house with us everywhere we go. So many times while staying in my van did I wish I could wash my hands without finding a public restroom or cook in comfort without taking a small camping stove out into the rain or to heat up the limited amount of food that stays good without a fridge or the safety of a pantry.
Here is how we set up the first of the two:
Here is how we set up the first of the two:
Water (More photos coming)
We ran through many scenarios of where our water would be stored and how the system would work. For example, we could have a large tank under the bus or a small tank inside the bus; we could have an electric water heater or a propane heater; and then a heater with or without tank. There are many ways we could have done each step of our water system, so rather than going through each possibility, I will explain what we did do and the reasons for it.
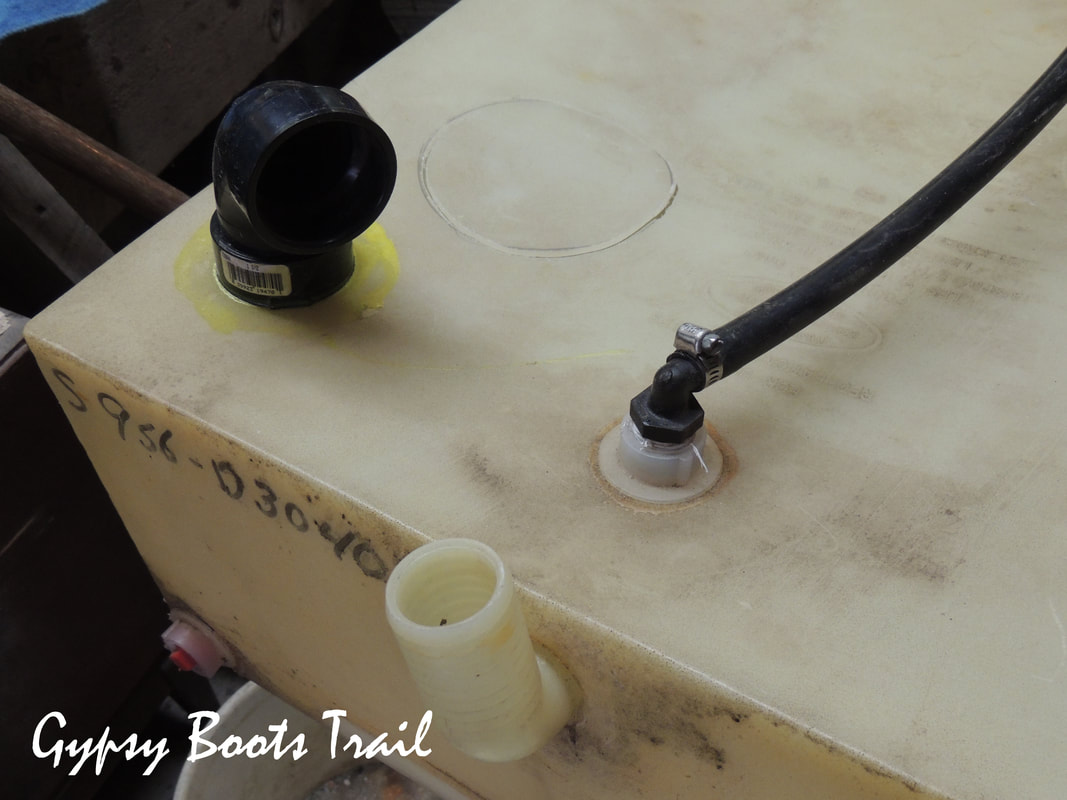
Our fresh water tank is a small 50L tank we found in an old RV. We went with a small tank in order to be able to keep it inside in our utility closet to avoid freezing. Along side the small tank we also have two Calligan jugs of water to re-fill it.
The water tank feeds both the sink and the shower. We have a Flojet 2.9 GPM(Gallons Per Minute) water pump with 50 psi, that uses 10 amps and runs on 12-volt power. As a safety measure we added a switch that allows us to turn power to the pump on and off, something I would definitely recommend because as the bus bumps along the faucet could shake itself on. We didn't add an additional small sink in the bathroom as some people do because we found it both unnecessary and it would have involved additional construction to move the water to the other side of the bus. The way we designed the bus we put the sink at one side of the closet and the shower on the other side, creating a short path for the water, making life easier on the pump.
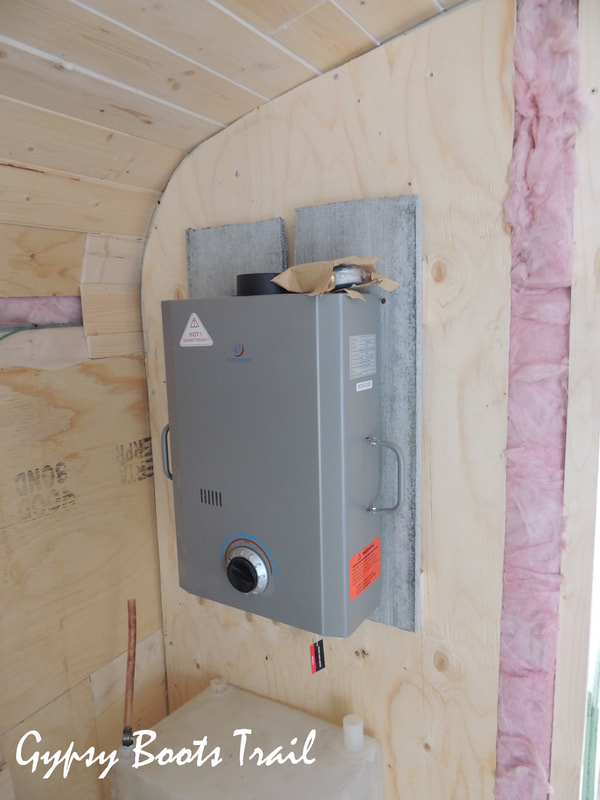
We looked for a water heater for a long time before deciding on the Eccotemp 1.7 GPM Liquid Propane Heater. 1.7 GPM is the lowest amount of water pressure you would want for a shower, but with cost in mind (as always) we were happy to take the hit on pressure.
Hooking up an indoor/outdoor tankless water heater inside a bus is tricky business which involves a lot of safety precautions. Luckily (as always) we had my dad to help us install it in the safest way possible. This started with the installation of fire board behind the heater, and ended with re-venting the heater probably three times. This heater gives hot water on demand and therefore produces a lot of heat out the top of it. We decided to vent the heater out to the side and needed to protect the wall behind, the wall beside and the wooden ceiling; this involved using a double-walled chimney pipe.
Hooking up an indoor/outdoor tankless water heater inside a bus is tricky business which involves a lot of safety precautions. Luckily (as always) we had my dad to help us install it in the safest way possible. This started with the installation of fire board behind the heater, and ended with re-venting the heater probably three times. This heater gives hot water on demand and therefore produces a lot of heat out the top of it. We decided to vent the heater out to the side and needed to protect the wall behind, the wall beside and the wooden ceiling; this involved using a double-walled chimney pipe.
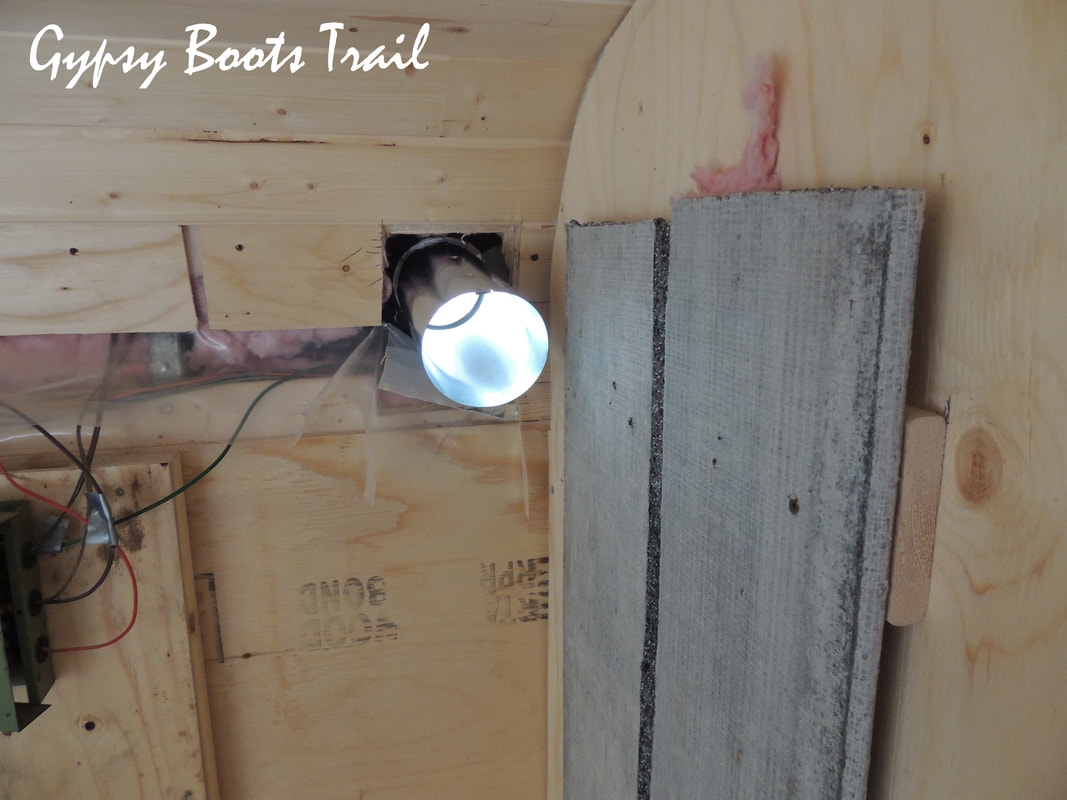 Don't fret, we used a licensed propane technician to certify our work as safe and sufficient! |  |
From the sink and the shower the water drains to a 150L grey water tank under the bus. Simple right? Hardly. Being the scavengers that we are, we found this water tank in yet another old RV; being the RV novices that we are, we didn't realize we had found a fresh water tank or that somehow there was a difference between the two.
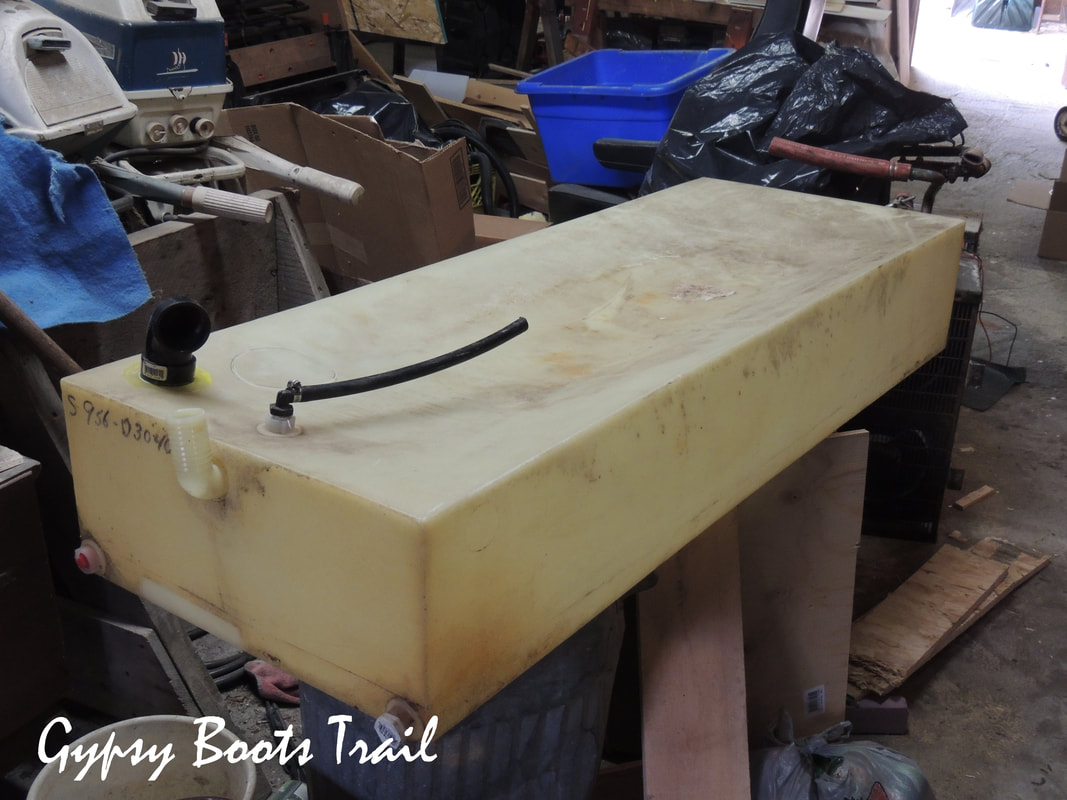
My dad explained the whole thing to us and took on the very complicated task of putting in the new holes in the tank we needed to make it work. Someone else may have paid the $300-500 for a real grey water tank, but instead we took the hard way out. Note the hole cut into the tank in order to attach fittings on both sides of the tank wall and then resealed to avoid spillage.
Another step to the water drainage problem was how to attach the newly customized tank to the bottom of the bus. And voila, a day of welding later, we had a custom frame installed. I say voila, though we all know that is no simple feat and that I was not the one welding.
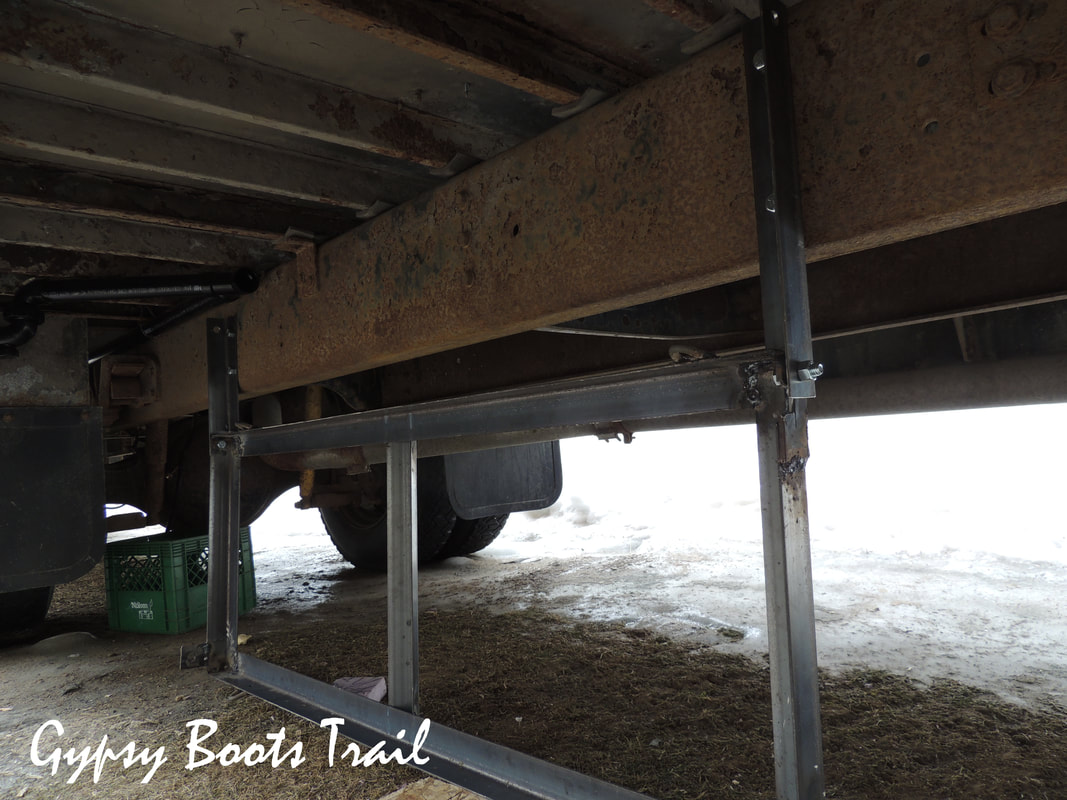
Lastly, is the tricky business of running the drain pipe the short distance of the length of the tire at an angle downward enough to drain the water effectively. Its not a very comfy place tucked in between pieces of the frame behind a school bus wheel well.
While on the topic of water, here is a look at the snazzy shower that will benefit from all the hard work to get running water into our home.
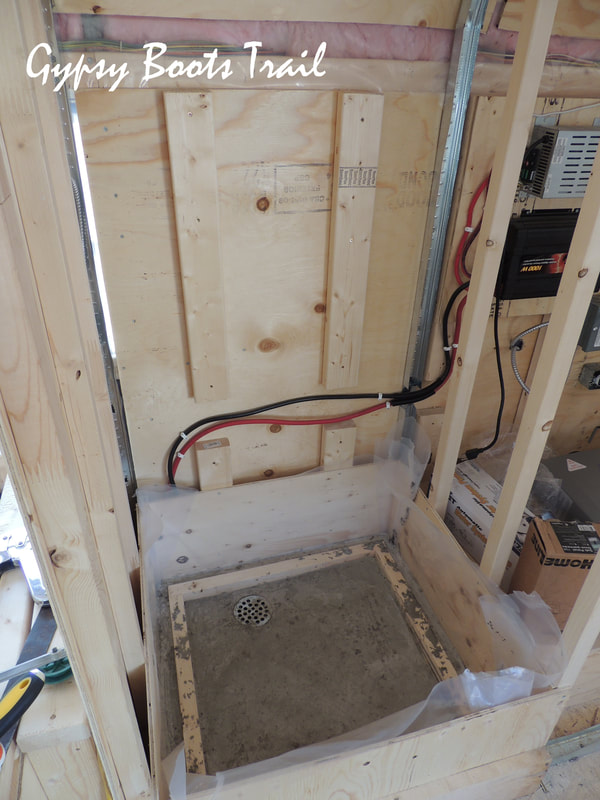 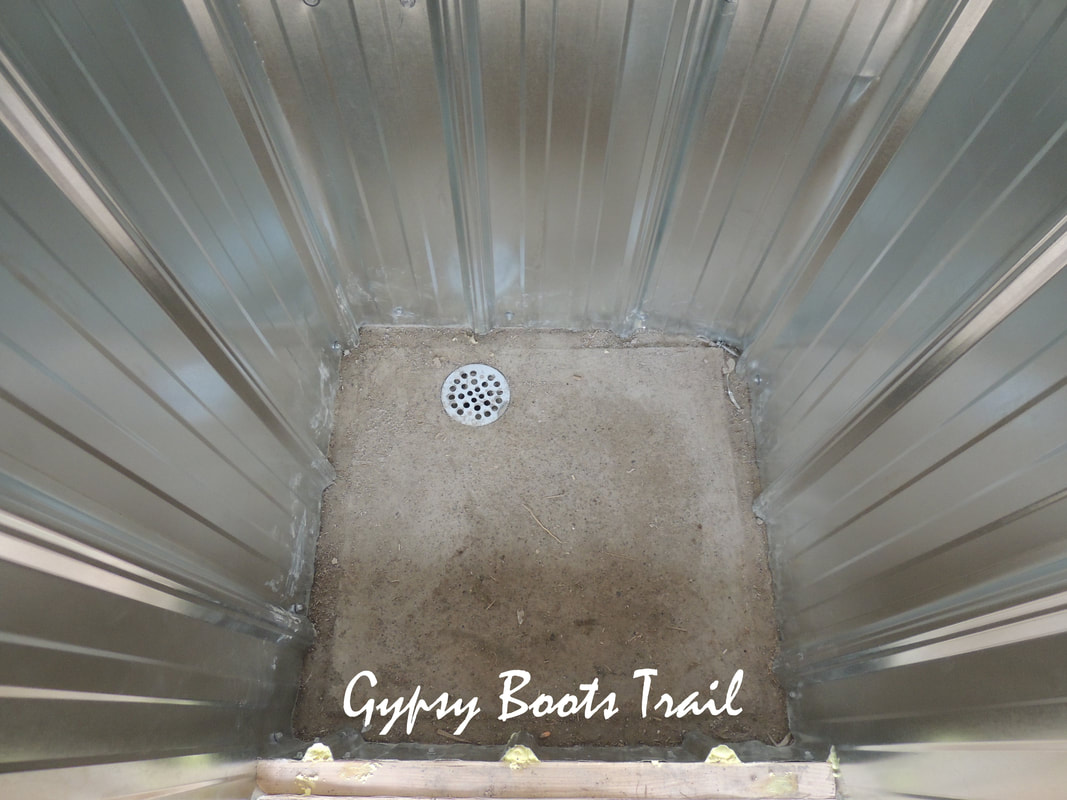 With the cement floor dry we were able to install the metal walls which were two separate pieces of metal roofing that over lapped and were fixed to the outer walls with roofing screws. | 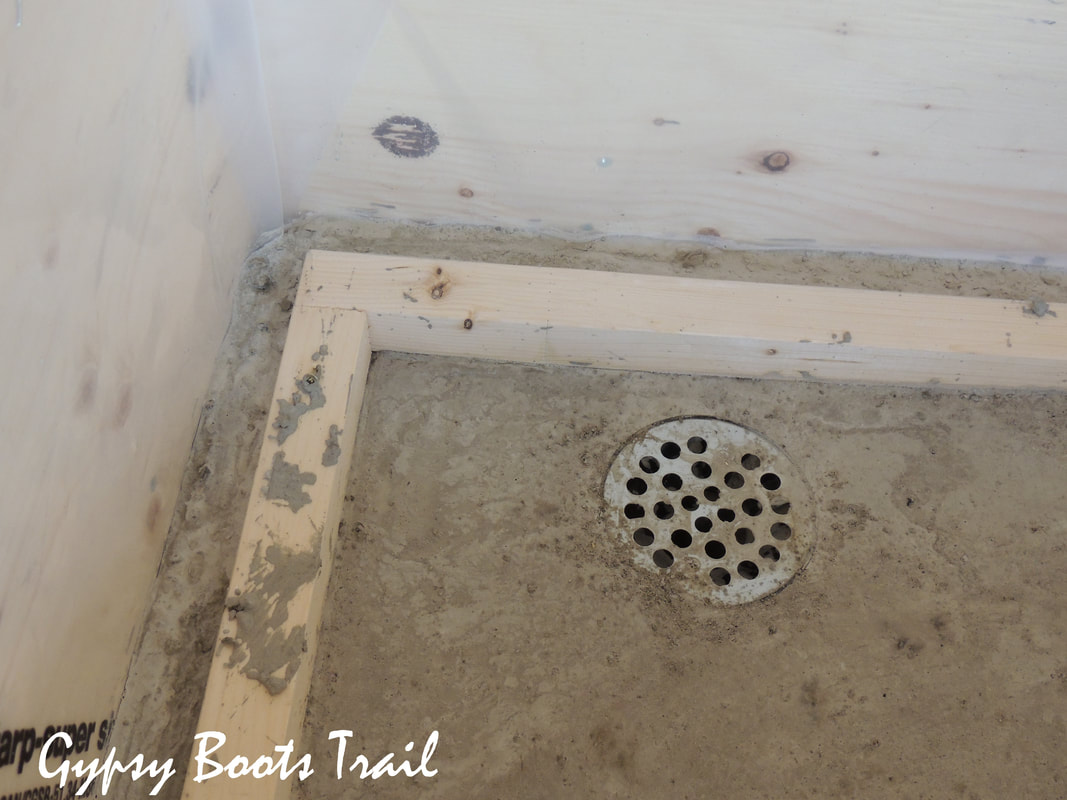 The 2x2 frame was set in the cement to make a high outer border that the metal walls would drop in front of to ensure the water wouldn't flow behind the walls. 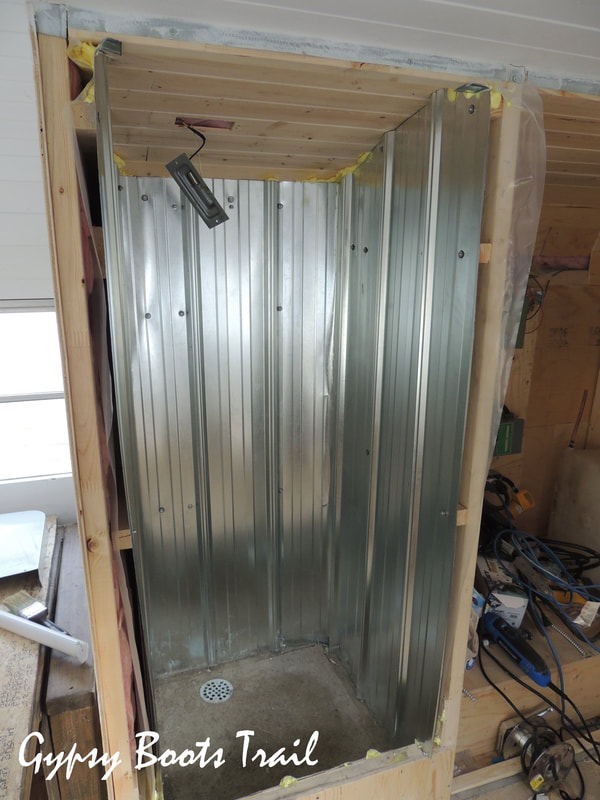 |
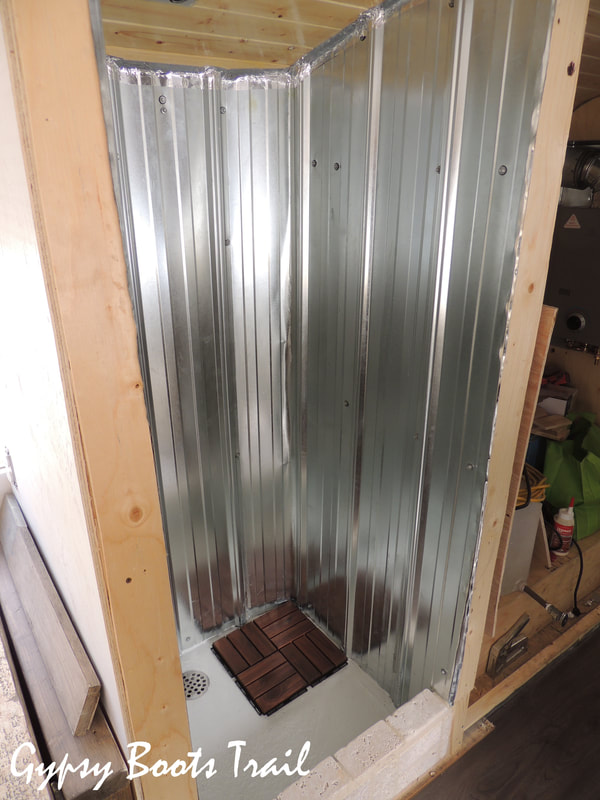
Waterproofing measures included numerous layers or shellac on the ceiling and silver chimney tape to cover the seams. As well, the front of the shower has a low piece of the roofing metal that is covered by some fancy tiling to keep the water falling behind it. As well, the floor was painted with the same paint we used to seal the bus floor after we removed the rust.
 RSS Feed