Everything Electric
Dads been working hard and learning a lot with us about the electrical system of an RV. He's done electrical work in houses before, and has owned a couple different trailers and RVs, so, with all of that experience and knowledge, he's installed for us our electrical system. We've decided to model the bus after an RV because it gives us a couple different options for power; we can plug into a 120V receptical or run off our deep cycle 12V batteries when adventuring.
I started talking about electrical in post Eighteen if you're interested in seeing how we ran the wires behind the wall and ceiling.
I started talking about electrical in post Eighteen if you're interested in seeing how we ran the wires behind the wall and ceiling.
The way this system works is a little complicated, but I'll do my best to simplify the whole thing!
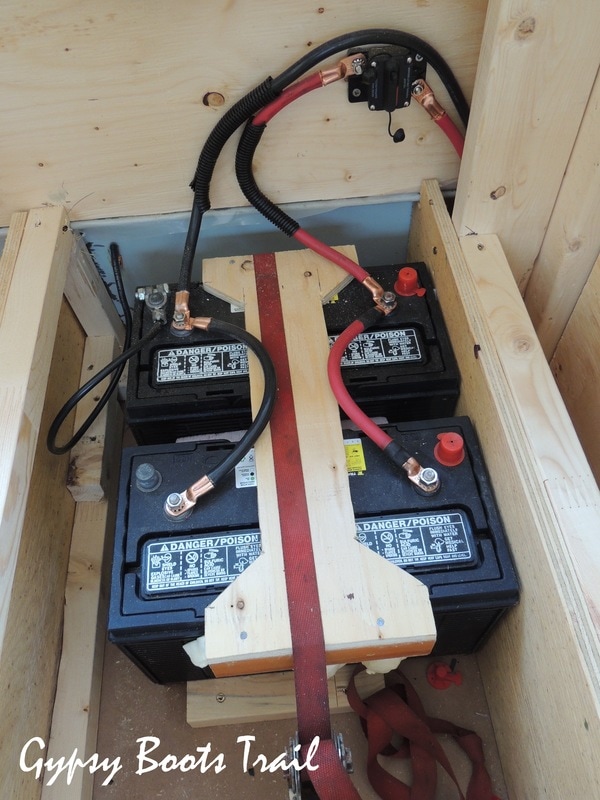
We have two deep cycle 'Big Red' Marine batteries connected in parallel. This means that the voltage is still 12; positive is connected to positive and negative is connected to negative. We we crossed them it would double the voltage from 12V to 24V. If you are using smaller 6V batteries you would want to cross them. In the above picture you can see the batteries in their custom tightly sealed box. The box is air tight and vented out through the wall because when the batteries are being used they release a gas that we did not want building up under our bed while we slept. Theres also space for a third battery if we find we are spending less time close to a charging source (120V electrical plug-in).
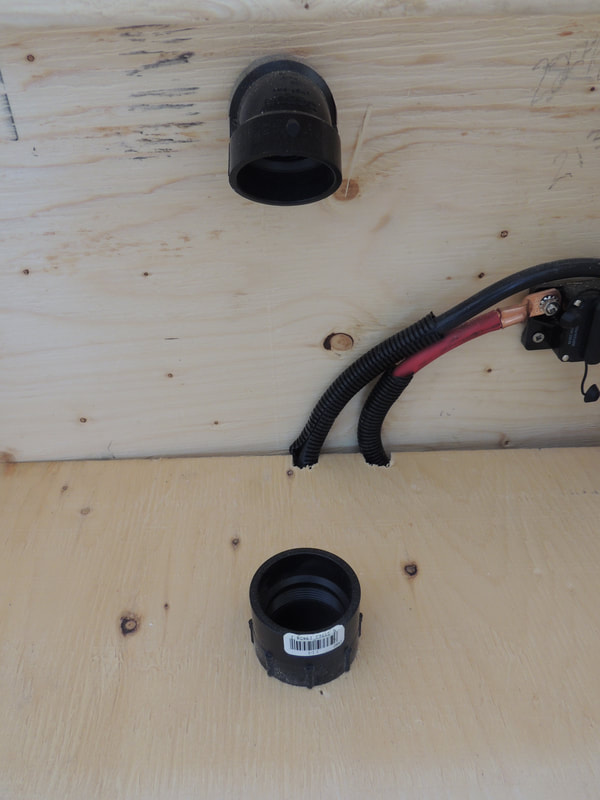
Just above the box, not covered when the lid is on the box, is a fuse to prevent the batteries from overheating and setting fire. If ever we overload them, this fuse will cut power the same way a fuse will do in your house.
Just above the box, not covered when the lid is on the box, is a fuse to prevent the batteries from overheating and setting fire. If ever we overload them, this fuse will cut power the same way a fuse will do in your house.
 | 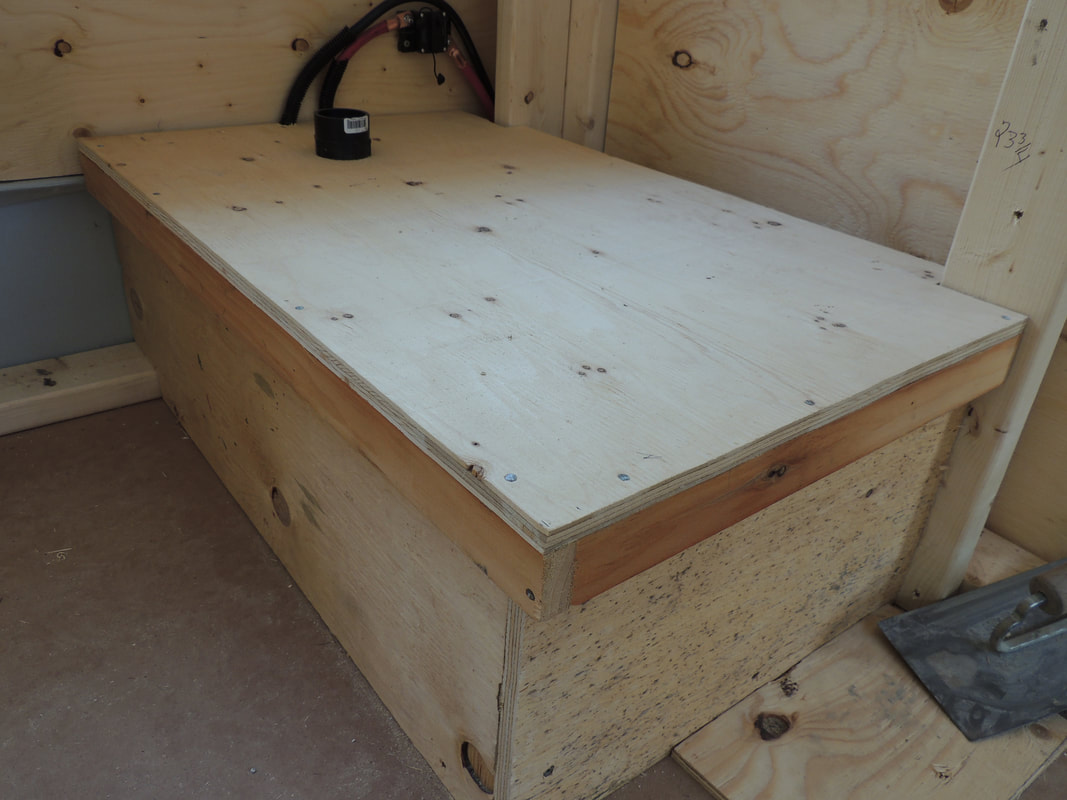 The battery box is located under our bed, up against the side of the shower. You don't want to run battery cables too far, and so ours only needed to run the length of the shower to reach our utility closet. |
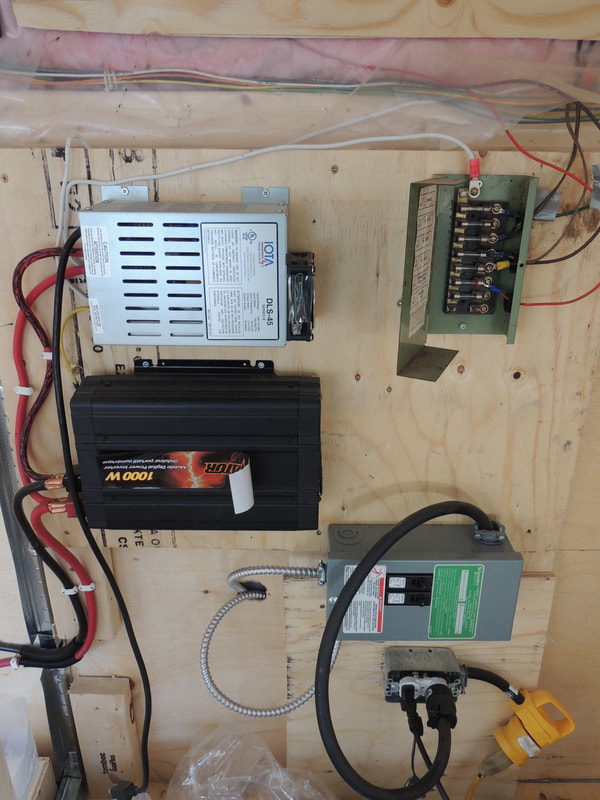
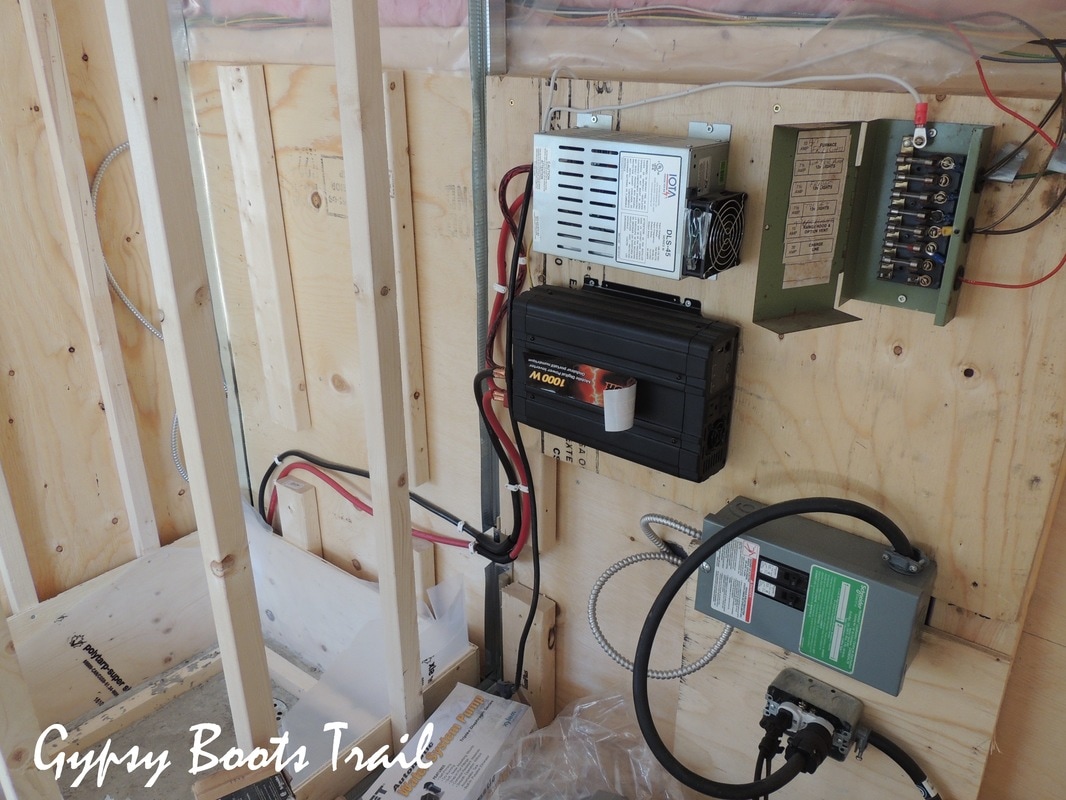
This mess of wires is what lines the back wall of our utility closet. The red and black battery cables run to both our inverter (12V to 120V) and our converter/battery charger (120V to 12V). Having both of these gives us the option to plug the bus into a 110V outlet (RV park or parents house for example) or to run all of our 120V electrical outlets off the 12V battery power.
The other two boxes you see in the photos are the fuse panels, the top one for 12V fuses (salvaged from an old RV), and the bottom a standard 120V fuse box you'd find in a house with two 15W fuse switches.
To use an external source of power we plug our thick black RV electrical cord rated for 30W into a power source and connect the other end to the yellow plug you see in the picture above connected to the outlet. Then, we plug the 120V fuse box and the converted (silver box) into the two outlets being now powered by the external source of power.
To run everything off of our battery supply we simply plug the 120V fuse box directly into the inverter.
Still Have Questions?? Comment Below!
 RSS Feed